Are you a room parent at your child’s school? I am and it is loads of fun. But, sometimes its hard to find age appropriate game, crafts and non candy prizes to make your party really great. In steps, Oriental Trading. Whether your party is religious, wild and crazy or just plain fun they have the party stuff for you! This year for Halloween my kids classes are going to flip at the fun I am bringing to the party! Check them out!
Astrid Costume, How to train a Dragon
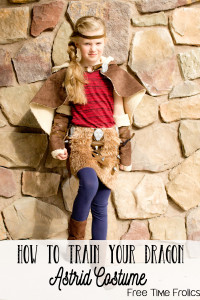
Costumes are one of my favorite things to make. Especially if I get to be creative when I do it. My little miss always has some fun ideas for costumes. Last year she chose Astrid, from How to train your Dragon. I was super excited. Astrid is Sassy, Strong and smart. Just what I want my daughter to be! This is a great costume if you have a daughter and a son to make your dragon!
Disney Descendants Mal Coronation Dress
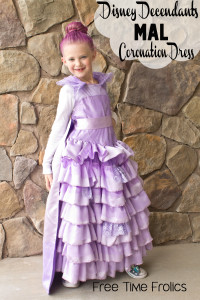
This little girl has my whole heart. She loves ruffles, crafting, sewing, playing with bugs and digging inthe dirt. SO when she said she wanted to be Mal from Disney’s Decendants for Halloween I rolled my eyes. Up until now she has let me pick her costumes. Some of my favorites are Rainbow Brite, Astrid from How to train your Dragon and Little Bo peep. But this year was a little different.
Orion Constellation Costume
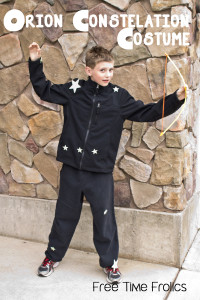
A while back my son had to do a project in school about outer space. He had to dress up or create a project about space. Now my boys have always loved learning about space and space travel so this project was right up our alley. Instead of doing a project, we decided to do a costume. I came up with this super easy Orion constellation costume.
Paw Patrol Zuma Halloween Costume
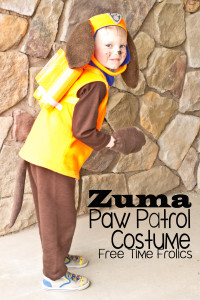
I know Halloween is over but this Mom just didn’t get time to blog about it. So here we are 1 week later and just getting costumes on the blog. My preschooler is in love with the Paw Patrol, especially Zuma.
He along with every other 4 year old.
He is obsessed.
The action figures have a permanent place on the front living room coffee table. He and his sister play for hours together. So when he asked to be Zuma, his favorite rescue pup, From Nick Jr.’s Paw Patrol I said let’s do it. [Read more…]
DIY Trick Or Treat Bags
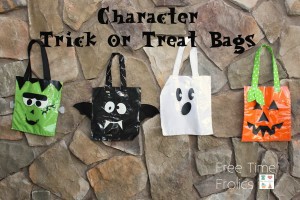
This year I wanted some thing a little different for my kids Trick or Treat bag. I thought it would be fun for the kids to see how much candy they had with out opening the bag. So I came up with these.

You can make them in any Halloween shape you want. Bats, Pumpkins, Frankenstein, Monster or a Ghost. Today I am going to show you how to make a Bat.
Here is what you need:
1/2 yard Black Fabric
2 sheets black felt
Black thread
Clear vinyl plastic
White & black vinyl
(I buy my vinyl from Vinyl Expressions. it is inexpensive and you can buy as much or as little as you would like. See the link on my side bar)

Cut your fabric the size you want your bag, I cut mine 12×24. Fold in half to make 12×12. M:ake the folded edge the top of your bag.
Cut your clear vinyl to be 12×12.

Cut your 4 wings. Take 2 wings and stitch around the outside edge of the wings. Layering 2 wings gives them a little strength. This will help them stick out better.

Slide the wings in between your fabric layer. Pin into place. Stitch down both sides and the bottom.

1. Cut your fabric for your handles. Cut a strip 5×45.
2. Fold 1 side in 1.5 inches and press.
3. Press.
4. Fold other side in 1/2 inch and press.
5. Fold the same edge as step 3 another 1.5 inches and press.
6. Stitch down the center. Along the folded edge.

Cut your handles the length you want them. Mine were about 13 inches each. Pin them to the top of your bag.
Stitch them into place.

Add your face. I purchase my vinyl at Expressions Vinyl  . You can buy any size and color. To make your face you can use your vinyl cutter or freehand it. For this project I freehanded it. I used a few scraps I had. I cut large round white circles for the eyes. Then added 2 small black circles. With the scraps of white I made 2 small fangs and a grin. It took me about 5 minutes.

Here are a few others I made.


Please Welcome {Simple Simon}
I met these 2 awesome ladies over Labor Day Weekend at Swiss Days in Midway, Utah. Swiss Days is the Ultimate, Outdoor Craft Boutique. Art, Handmade Goods, Food and Entertainment. If you happen to be in Utah over Labor day. Stop and shop a while. These Lovely ladies had a booth. I do have to say I was a little celebrity shocked. I recognized there logo on there items and loved them. I have been a fan of Simple Simon for a while. So I asked them if they would guest post. They said yes!! {Squeal} So here they are…
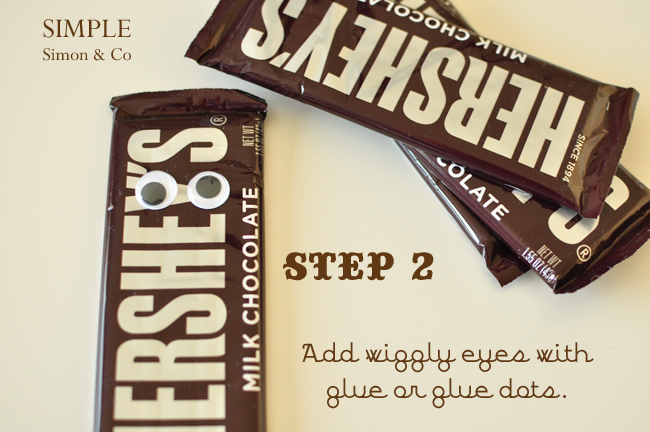
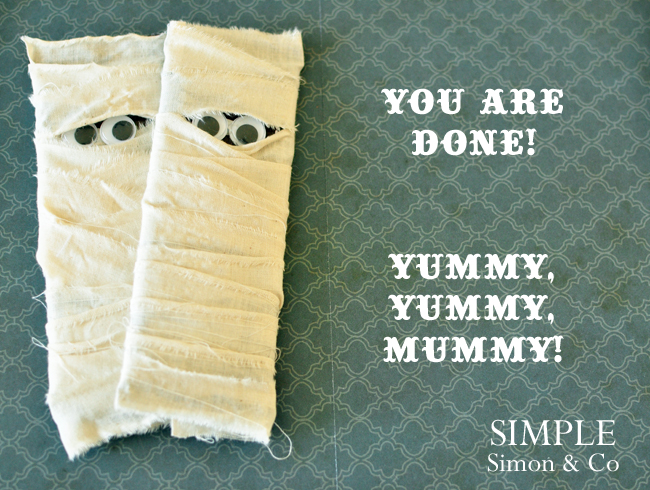
Hi! I am Elizabeth from Simple Simon & Co, one-half of the duo of sisters-in-law who love to sew, thrift, and make simple projects! And today’s project especially fits the simple category.
I have made these in many-a-classroom Halloween party, with all ages of kids and they have always been a success! {It’s the candy bar effect….candy bars are always a success.}

Here’s what you will need if you want to make them with your kids too:


Thanks Adrienne for inviting us!!!! {And it was so nice to meet you earlier last month…..what a fun chat!}
So fun Elizabeth! Thank you for visiting with us. If you haven’t been to there blog head over and take a look. They have tons of fantastic tutorials. They also run Project Run & Play. A fun competition on line for children’s clothing. They also do Skirting the issue. Please head over and check out what Simple Simon is all about.


This post was sponsored by:
Check out the entire post on my blog www.freetimefrolics.com
Halloween Printable’s
A few Free Printable’s just for you. Please follow the Free Printable Guidelines below.


Free Subway Art for your Halloween Mantel.


Click on the link or Right Click the image and save to your computer. Print wherever you like.
PLEASE follow the following rules for Free Time Frolics printable’s:
- I would love for you to become a follower of Free Time Frolics via Rss and Facebook. More Free Printable’s are coming. You don’t want to miss out.
- Free Time Frolics printable’s are for PERSONAL USE only. You may not re-sell, re-distribute, or claim them as your own.
- If posting on the internet, you MUST post a link back to the original post or the Printable’s page.
- Freebie printable’s are offered “as is” unless otherwise noted.
- Pin, share, use in your home or as a gift. Enjoy!
Check out the entire post on my blog www.freetimefrolics.com
Itsy Bitsy Spider Door Decor

This year for Halloween I wanted a little something different for my front door. There are some many cute wreaths out there. I love them all. I was wanting something a little more non traditional. I found my idea at the Dollar store.
Here is what you need:
2 googly eyes
spool 3/8 inch black ribbon
Foam pumpkin
Spider web
Hot Glue
Dowel or skewer

Start by wrapping your ribbon on to a skewer or dowel like in this post: Here {Spider Hair Clips}
After baking your ribbon cut into 8 equal parts.

Take a skewer and punch a hole into the pumpkin. Use the skewer to push the ribbon inside. Use a bit of hot glue to secure the ribbon into place.

Add your googly eyes.
Depending on how long you want your spider to hang, cut your ribbon accordingly.
Use the skewer to punch the ribbon through. Dab some glue to the hole and ribbon to secure.

Your spider is ready to hang.
Add your Spider web and your new spider has a home!

I added mine to my front door. Not quite your traditional door decor. But sometimes I am not so traditional!

Don’t forget the Masquerade Ball is up and going. Stop by and link up your favorite Handmade Halloween Costumes. Some serious prizes are up for grabs. Will one go to you???


![]()
Check out the entire post on my blog www.freetimefrolics.com
Please Welcome {52 Mantels}


Today I have a fun painting technique to show you as well as an easy Painted Halloween Sign! I’m so glad that Adrienne invited me over to participate in the Masquerade Ball. I love the fun costumes of Halloween and I can’t WAIT to get inspired by you all!


Painted Halloween Sign {using a charcoal transfer method!}
supplies:
unfinished wooden plaque
mod podge
paint brush
charcoal pencil
decorative paper (I used a chevron treat bag because I liked the pattern!)
an image to trace (I used this bat and added words. But, you could use any image you can print on plain printer paper!)
paint (I used black acrylic)

After gathering supplies, cut your paper to fit the plaque’s face. Attach the decorative paper to the wood by painting mod podge under and on top of the paper. After the mod podge dries, take a cloth or paper towel and “paint” the plaque’s sides with black paint. You could do this with a brush, if you’d rather. I wanted a rough, distressed look, so I dry-rubbed the paint on the sides with my paper towel, letting some come over onto the paper.

To transfer your image onto your dry plaque, rub charcoal over the entire backside of your image. Place the image, charcoal side down, onto your plaque. Take a pen, pencil or sharp object and trace around the entire image. For the letters, trace around the edges. When you lift the paper, the design will be outlined in charcoal. So cool!

After your design is traced onto your plaque, take a small paintbrush and paint inside the lines. After my plaque was done, I painted on small, flying bats to add a bit more.
Wah-la! You have a hand-painted Halloween Sign! Now that you know this technique, you can use it for all KINDS of things! Get creative!


You can find Emily at 52 Mantels a blog about all things home, including weekly mantel makeovers, seasonal crafts, easy recipes and simple DIY projects. Come over for a visit!
 |
 |
 |
 |
 |
A Big Thanks to Emily for Posting today. What a fun project to do. I may even have my older boys try that out! Please head over to 52 Mantels and check it out. So many great ideas!!! The Masquerade Ball Link Party is up and running. Se sure to add your Handmade Costumes!
This post was sponsored by:

Check out the entire post on my blog www.freetimefrolics.com