Burlap is super popular this season. I have been seeing it everywhere. I wanted to add it to my decor this spring to give ti a little rustic look. My door needed a little sprucing up. I love bunnies and it just happens to be the season. So I found some embroidery hoops and Burlap at Joanns and went to town. I made my bunny for less than $5! Not to bad for door hanging Peter cottontail! He was super easy to make and took about an hour. So lets get started!
Burlap Bunny Tutorial
Supplies:
2 embroidery hoop. different sizes
1/3 yard burlap- more if your hoop is larger than 12 inches.
fabric scraps
Glue gun
electrical tape
cream or white yarn for pom pom
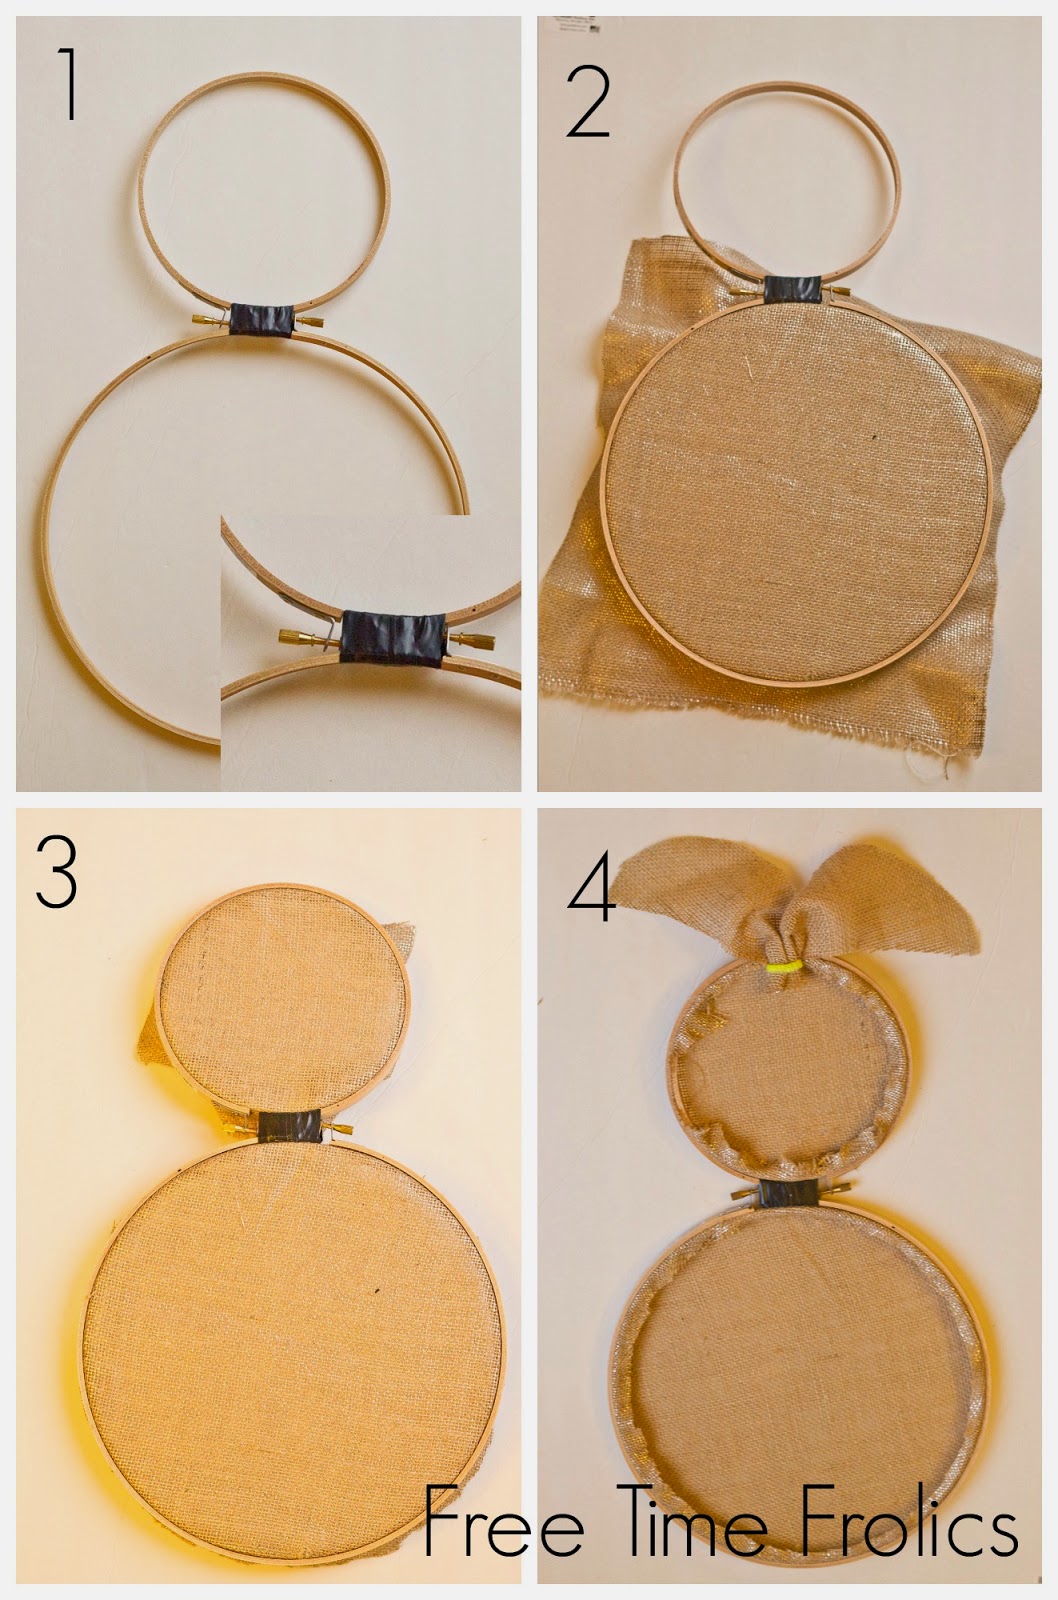
1. Tape your hoops together. I used electrical tape because it had a little give in the stretch. Tape them with the tightening screws facing out so you can get your burlap in.
2. Start with the bottom burlap. Just add like you normally would. Make sure your fabric is in tight.
3. Add burlap to the top hoop.
4. Trim your edges and hot glue the frayed burlap to the hoop. Cut a 6-8 inch rectangle. Cut down the center about half way and then shape to loop like ears. Pull the bottom edges together and bunch up to make bunny ears and attach them to the hoop.
Add your embellishments and you are all done. I added a few rosettes for the ears and a matching neck bow. Then a pom pom for the tail. You could also add a little color to the ears.
Use your bunny on a door or mantel with your Easter decor. Do you have a favorite door decoration for Easter? Please share!
(Visited 17,053 times, 1 visits today)


Cute and easy…? it.