Washi Tape Ornaments
What you need:
Washi Tape (Michaels has great new festive tapes this season. Just ab out any Christmas color you can think of, even gold and silver)
Foam core ( I get mine at the dollar store)
Exact-o Knife
Modge Podge
Frame
Ribbon
Opt: Vinyl saying
I first took an old frame I had and covered the glass with white paper. Missed this picture but you can just imagine it.
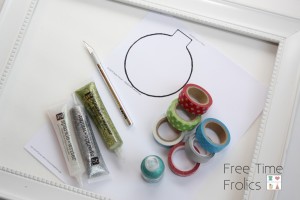
Next I found some ornament shapes on the Internet and printed them. I flipped them wrong side up and covered the paper with washi tape. Then cut them out.
Take some modge podge and glue the ornaments to a piece of foam core. I got mine at the dollar store. Let the glue dry. Putting them on the foam core makes the jump off the page. Not so flat.
Once the glue is dry use an Exact-o knife and cut around the edge of the ornaments. To give my ornaments a little sparkle and texture I used glitter glue pens to dot the polka dots, and lines on the washi tape. It is hard to see in the pictures but in person they look great.
Once your ornaments are cut out, place them on your frame. I played a little with the placement until I liked it.
Add some ribbons for strings and bows with glue dots.
Once I got this far I thought I would be happy but I decided to add the Phrase Merry & Bright to my frame. I think it finished it off perfect!!! I just love how it turned out.
Buddy The Elf!!
I find as I get older, the idea of Christmas is Nostalgic to me. I yearn for a Vintage Christmas. Lots of Snow, Real Christmas Trees, handmade Ornaments. You know the kind we had when we were kids. I loved watching Christmas movie, seeing Santa and driving around to see Christmas lights. So this year I am trying to make a less commercial and more down home Christmas. I love sharing old movies and music with my kids. One of my favorite movies is Buddy the Elf. I realize its not super old but its older than my kids. So to them its Vintage. Buddy makes me Smile!
Today I am sharing my favorite quote from the movie! Enjoy! Just Right Click on the image you want and save to your computer.
- I would love for you to become a follower of Free Time Frolics via Rss or Facebook. More Free Printables are coming. You don’t want to miss out.
- Free Time Frolics printables are for PERSONAL USE only. You may not re-sell, re-distribute, or claim them as your own.
- If posting on the internet, you MUST post a link back to the original post or this page.
- Freebie printables are offered “as is” unless otherwise noted.
- Pin, share, use in your home or as a gift. Enjoy!
Fingerless Gloves DIY
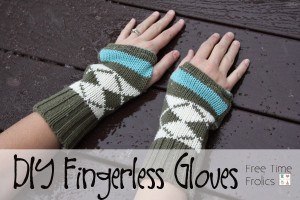
I love finger less gloves. I think they are cute and stylish. I was perusing my local thrift store when I found some old sweaters that would be perfect for my project. I found this sweater vest for $3.
I started with this Sweater Vest from the thrift store. I loved the argyle. I cut 3 inches from the sides of the vest. Cutting the front and back. Leaving one seam intact. Using the bottom of the vest gives you a finished edge.
Fold your gloves right sides together. Pin edges together. Stitch along long edge.
Fold the raw edge down 1/2 inch to the wrong side. Making a small casing.
Thread 8-10 inches of 1/8 elastic through the casing. Tie off your ends.
All finished.
Head out and sport your new Finger less Gloves.
Rainbow Snow
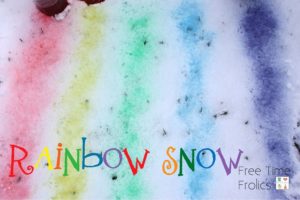
I was thinking a few weeks ago with our first snow, it would be fun to have colored snow. So Little Miss and I headed out to the store for spray bottles. We came home and mixed each one with a few drops of food coloring and we were ready to go.
My kids had a blast with the colors. They can’t wait for it to snow again! Next time we will make a Snowman with my snowman kit.
Fall Mantel
I know I am a little late getting this post up. My Mantel has been falling behind. So many things to make and do for the holidays. Here is my simple Fall Mantel this year.
I used my Thankful trees from last year. My Free Fall Printable. A cute set of pilgrims and 2 stacked wicker pumpkins. I kept it simple and easy this year. I can’t believe it is already time to decorate for Christmas. This fall has gone by way to fast.
Lighted Shadow Box Nativity
This season I decide to make a Nativity table. I started collecting Nativities when I was flying around the world. I love the nativity. I love the simplicity and spirit they bring to my home. And they serve as a reminder of the reason for the season.
Here is what you need.
12×12 Shadow Box
black spray paint
string of battery operated lights (10-20 lights)
Glue dots
Etched Glass Vinyl ( I buy mine at Expressions Vinyl)
Vinyl Cutter
I started by picking my image in my Silhouette Designer. I decided on this Nativity scene. I sized it to fit my frame. I cut my etched glass vinyl according to my Silhouette guidelines.
After cutting I used my transfer tape and cover the whole image. I wanted to have my glass with the negative space frosted. I found this to be the easiest way to use the negative space with the least amount of application problems, Peel your vinyl and tape from the backing.
Apply your vinyl to your glass. Start in one corner and rub out any air bubbles as you go. Once you have added your vinyl, you are going to remove your print. I removed just the picture.
Remove the print slowly. If you pull to hard or fast you can tear the vinyl you want to stay. Once you have removed all the vinyl you need to set it aside.
Next I painted my frame backing black. Just one quick coat. Start with your lights and stick a glue dot where you want to start your lights. I started mine on the side so my battery box can set on the table behind the box. String your lights throughout the backing board using glue dots to hold the lights down. I tried to make mine look like stars in the sky. Use glue dots to hold the wired against the board.
Add your backing to the frame and you are done.
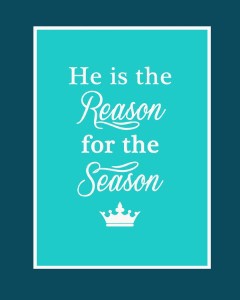
I added my free printable, “He is the Reason for the Season” Find it here.
He is the reason… Printable
This week has been a crazy one. I had a major project fail. Then I figured a new way to do it. Yeah! I will have it up soon. So because my project didn’t go as planned I am starting with a printable this holiday season.
With the Christmas season is just around the corner. I though I would start mine off with a free Printable. Since the Christmas season is celebrating our Savior’s birth. “He is the Reason for the Season.”
I made a few different colors. Hopefully one will fit in your house!
Right click and save to your computer. Print at your favorite photo center. Prints as an 8×10. Please follow the free printable guidelines below when using Printable’s at Free Time Frolics.
Thanks!
PLEASE follow the following rules for Free Time Frolics printable’s:
- I would love for you to become a follower of Free Time Frolics via Rss or Facebook. More Free Printable’s are coming. You don’t want to miss out.
- Free Time Frolics printable’s are for PERSONAL USE only. You may not re-sell, re-distribute, or claim them as your own.
- If posting on the internet, you MUST post a link back to the original post or this page.
- Freebie printable’s are offered “as is” unless otherwise noted.
- Pin, share, use in your home or as a gift. Enjoy!
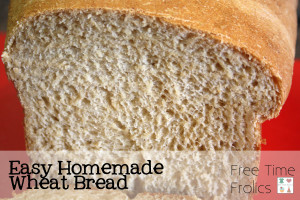
Easy Homemade Wheat Bread
For a while now (about 6 years) I have been making Bread for my family each week. I go through phases. Summer is hard due to the heat. I usually make it on Sunday’s and it lasts us the week. I make 4 loaves. Through trial and error I have finally found the best recipe. I grind the wheat in my sweet little grinder and mix the dough in my Mix & Blend from Blendtec. Roll it out onto my counter. Divide it into 4 loaves and bake. If you have ever considered making your own bread and were scared this is the recipe for you. I think of the 100+ times I have made it I only failed once. I forgot the salt. Bad, very bad Mistake. No flavor. This bread takes about 90 minutes to make start to finish. And during those 90 minutes you really only stand at the counter about 20. I do laundry or the dishes as I make it.
Now this is not to say I don’t buy bread. There are those times when it just isn’t going to happen. But I really try. It is healthier for my family. And less expensive in the long run. And delicious.
Masquerade Ball Winners
Thank you to everyone that participated in the Masquerade Ball. There were so many adorable costumes. But we finally got it narrowed down to the top 3! Drum roll Please.


- « Previous Page
- 1
- …
- 32
- 33
- 34
- 35
- 36
- …
- 49
- Next Page »
