A few Free Printable’s just for you. Please follow the Free Printable Guidelines below.


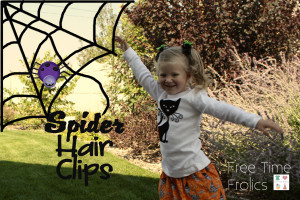
Free Subway Art for your Halloween Mantel.


Click on the link or Right Click the image and save to your computer. Print wherever you like.
PLEASE follow the following rules for Free Time Frolics printable’s:
- I would love for you to become a follower of Free Time Frolics via Rss and Facebook. More Free Printable’s are coming. You don’t want to miss out.
- Free Time Frolics printable’s are for PERSONAL USE only. You may not re-sell, re-distribute, or claim them as your own.
- If posting on the internet, you MUST post a link back to the original post or the Printable’s page.
- Freebie printable’s are offered “as is” unless otherwise noted.
- Pin, share, use in your home or as a gift. Enjoy!
Check out the entire post on my blog www.freetimefrolics.com