Free Time Frolics

  • PRINTABLES
  • EAT
  • House
  • Make
  • Sewing
  • LDS
  • Home
  • About
  • Pr/Advertise
  • Contact
  • Shop
  • Store

Missionary Printable

July 14, 2012 By: Freetimefrolics

1 nephi 3:7 printable www.freetimefrolics.com

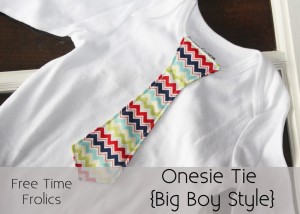
I was asked to put together  a few gift ideas.  Poppy Seed Projects has a lot of great ideas for  photo home decor and wood projects.  Fun to do for a girls night or Super Saturday.  Her is my ideas for a little boy.


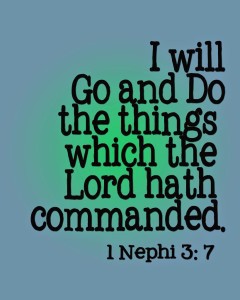
I added a CTR Block and Necktie to round out the gift.  Perfect for a Baptism or Missionary. Or just a great little reminder for your little guy.

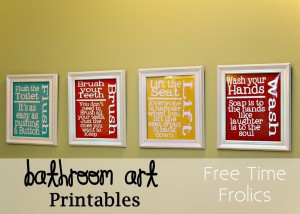
PLEASE follow the following rules for Free Time Frolics printable’s:

  • I would love for you to become a follower of Free Time Frolics via Rss or Facebook. More Free Printable’s are coming. You don’t want to miss out.
  • Free Time Frolics printable’s are for PERSONAL USE only. You may not re-sell, re-distribute, or claim them as your own.
  • If posting on the internet, you MUST post a link back to the original post or this page.
  •  Freebie printable’s are offered “as is” unless otherwise noted.
  • Pin, share, use in your home or as a gift.  Enjoy!

Date Night for 2 {Porch Makeover}

July 11, 2012 By: Freetimefrolics

For anyone who has young kiddos like me, you know it’s hard to get a date night with your sweetheart. Right? We struggle to get out once a week with little ones.  So I decide to transform my front porch into a Date Night for 2.  We sit out and watch the sunset, have adult conversation, sometimes we play games together on the I-pads.  We love to play Blokus.  Just sit back, relax, have a special treat and enjoy each others company. 

Here is what I started with. Boring, drab and no curb appeal.

I searched all over Craig’s List for some patio furniture. But nothing. So while I was at Target the other day they had most of there outdoor furniture half price. So I snatched up a set for a great deal. I added a pillow to each chair with fabric  I found  at Joanns a few months ago.

For the table I found this hurricane and candle at Ross. The candle was the perfect colors. I decide to use Turquoise and Orange. They look great with the stone work on my house. And they matched my Fancy House Numbers

I made Fancy House Numbers  with a 2×8, frame, paint and numbers.

I used beach balls to hang over head.  I found a few different sizes.  Sprayed them with spray paint for plastic.  Then used my color of choice to finish them off.

A great little place for my and the Hubby to unwind after the kiddos are in bed. 
Check out the entire post on my blog www.freetimefrolics.com

Onesie Neckties {Big Boy Style}

July 9, 2012 By: Freetimefrolics

Onesie tie pattern diy www.freetimefrolics.com
I found this great tutorial for Onesie ties over at Brassy Apple.  I love the simplicity of the little Onesies.  I started thinking, maybe I could give this a little more of a big boy look.  So I started playing around and came up with this baby onesie big boy tie.  

[Read more…]

Bathroom {Art} Printables

July 5, 2012 By: Freetimefrolics

bathroom art printables www.freetimefrolic.com

I have been needing to decorate my sons’ bathroom. Since I have boys I was wanting something a little more masculine.  I thought these printable’s would be perfect. A cute & funny reminder of what should take place in a bathroom.  Sometimes kids need a little help, right??? I saw something similar to these on the web one day and wanted to buy them or down load them or something. But alas, I had to make my own Bathroom Art.   Here is what I came up with.

[Read more…]

Firecracker Table Decor

July 2, 2012 By: Freetimefrolics

Firecrackers are always a great way to decorate for the 4th.  Here is a fun tutorial to use for your table scape or mantel.

Supplies:
2 glass vases in different sizes ( I found mine at Michaels)
1 inch ribbon about 1 1/2 yards
Glass beads (dollar store)
2 Tinsel from table weights (dollar store)
Glue Dots
Burn the edges of your ribbon with a match to ensure the ribbon does not fray.
Add to glue dots to the edge of the ribbon

Stick the glue dots with the ribbon running along the top edge of the vase

Wrap the ribbon around the vase.  Cut your ribbon to the length needed.  Cut and burn the edge of ribbon.  Use to glue dots to glue ribbon down.

Repeat for the bottom of the vase.

Fill your vase with blue glass beads
Next take your table weight and remove the tinsel.  Place your tinsel down the center of the beads.Voile you have your Firecracker.  Now repeat the process for your second Firecracker.
To show off my project I added a white glitter star and a charger plate to keep them on.

I am so excited to celebrate America’s Birthday.  Here in Idaho we have warm days, cool nights and fantastic Fireworks for the holiday. It is a true blessing to live in this great country. I hope you all have a fantastic, safe  holiday!!
Check out the entire post on my blog www.freetimefrolics.com

Fancy House Numbers

June 27, 2012 By: Freetimefrolics

How is your summer going??? Ours is in full swing.  The kids are home and we are trying to stay busy.  In between all the crazy I have been working on a few projects.  Here is one I think you will like.  I was talking with a friend of mine about my front porch. I have no clue what to do about it.  She told me about a show that shares tips for making your house appealing. From the outside.  (No cable at this house. Just digital rabbit ears for basic local stations).  On one of the episodes they mentioned 3 things to make you house look inviting from the outside. 
1. Paint your door a fun bright color.
2. Add Shutters
3. Have a fun way to display your house numbers.

So after contemplating each of them I decided that #3 was the way for me.

Here is my supply list:
1 lenght of Pine.  2×8
long rectangel brackets to secure boards together
screws
Paint colors of choice
numbers for my house
picture frame
chalkboard vinyl

I started with 1 length of pine. I cut it into lengths of 18 inches.  I ended up with 5 lengths with a few inches left. 

Next I spray painted my numbers black.  And sprayed my boards my color of choice.  I went with turquoise, burnt orange and white. I did a light coat, to let the wood grain show through a bit.

Sand your boards just a bit, if you like for a bit of a weathered look. 

Lay your dry boards together how you want them.  Flip them over and screw your bracket into place.

Once my brackets were secure I flipped my boards back over.  I placed my numbers where I waanted them and screwed them into place.

I added this frame so I could leave messages for visitors coming in.  Sleeping baby please knock, Leave packages at the door or Welcome friends.  Lots of options for this little frame.

So I found the frame at TJMaxx.  I sprayed it my favorite color (Turquoise) and took out the glass.  I cut a piece of chalk board vinyl I got from Pick Your Plum and placed it inside the frame.  I added the glass behind it and a piece of card board.  Took the back of the frame off.  It had a back with a stand on it that you could see if was on. 
I used 4 nails ot hang the frame on and keep it from moving. 

Hang your numbers outside your door and enjoy. I love the pop of color it adds to my front porch.

Do you see the nest on my front door wreath?  I made the wreath and hung it back in April.  Within 2 days a cute little Mama Robin began building her nest. She worked on it for a week. Then abandoned it because there was so much traffic.  Everyone askes me where I got the nest.  They can’t believe a bird built it.  Someday I will take it down and save it for someplace special.
  

Thanks for sharing your Free Time with me.  Have a great week.

Tip Junkie handmade projectsVisit thecsiproject.com52 MantelsPhotobucketI Heart Nap TimeSixSistersStuff.com

Check out the entire post on my blog www.freetimefrolics.com

Guest Post at The Brassy Apple

June 26, 2012 By: Freetimefrolics

Hi every one today I will be guest posting over a the Brassy Apple for the SOS summer series.

 Head over and check out my fun 4th of July Firecrackers for your table center piece. 

  Lots of things to see and do over at the Brassy Apple.  Go take a look.  I’ll be back tomorrow with a fun outdoor project for your home! Make sure you find a little Free Time and come take a look.

Check out the entire post on my blog www.freetimefrolics.com

{Pin}tastic Friday- Must have Maxi Dress

June 22, 2012 By: Freetimefrolics

I found this pin a few weeks ago and finally got the time to make one for my Little Miss.  Simple Simon & Co. Made this adorable Maxi dress from a T-shirt and Knit fabric. 

(Source)

So I thought I would give it a try.  My Little Miss has been begging me for a Zebra Dress. So with a little zebra print and a cute hot pink shirt I went to town to make one of these with a twist. Here is my take on the Must have Summer Maxi.

 I added a flower to the front and a little clip in the back to take it in.  I made this with a size 5 t shirt and it was a little big.  So I added a little length to let her grow. She loved wearing it to church and wants to wear it all the time.  I make have to make a few more to get us through the summer.
The best part about this dress.  It took me 30 minutes to make.  {Bonus} Perfect for summer! Now go make a few for your little miss!

Check out the entire post on my blog www.freetimefrolics.com

Patriotic Pinwheels {Washi} style

June 21, 2012 By: Freetimefrolics

I have been racking my brain at what I wanted to do for my 4th of July Mantel.  I have had a few things in mind but it needed some finishing touches. I was blog hoping the other day and found 52 Mantels.  I saw Emily’s all paper mantel and loved her flowers on the wall.  It totally gave me the idea why not use pinwheels. So I started looking for paper.  When I couldn’t find what I wanted I thought “I have all this washi tape.  What if I …” and there it was. Just what I needed to finish my Mantel.  Washi Tape Pinwheels. So here you go.


First decide on your paper.  I had brown craft paper on hand. Cut the paper to the size you want.  My sizes are 14,10,8,6,5 inches square.

Next cut from your corners in about 3/4 of the way to the center. Shown with small black dots.

Start covering both sides with Washi Tape.  I did mine in straight lines. But you can do whatever you want. Be sure to trim your washi tape at the edges. They tend to stick to each other. Push your Washi tape down really good.

Once you have designed your Pinwheel with washi tape it is time to pull in your corners.  Bring each of the four corners into the center. I numbered the corners 1’s or 2’s.  So either pull on all the ones or all the 2’s. Make sure they overlap just a bit in the center.

This is where you can be creative. I used a brad for mine.  But I was thinking you could use needle and thread and stitch them together, a brad or a button. Punch a hole right through the middle and add your brad or button.


Once you have finished you pinwheels they are ready to hang. For mine I used glue dots.

I think there fit perfect with the space. A little whimsy to my mantel.

They are so easy to make and fun.  Even the kids can help.
For tutorials on other elements check out my Mantel Post.
Have a great weekend.  Come on back when you have a little Free Time!

Visit thecsiproject.com

Check out the entire post on my blog www.freetimefrolics.com

4th of July Mantel

June 20, 2012 By: Freetimefrolics

4th of July Mantel

Its time again for a new Mantel.  I started a summer mantel but didn’t get it finished. So I figured I would do my 4th of July Mantel and use it for most of the summer. Here are a few features on my Mantel. I decided to go with an Uncle Sam Kind of theme.
Uncle Sam print.  I used the tutorial (Here) to make the print.  My Uncle Sam is 11×14. The little Uncle Sam hat was made from a pattern from The Quilted Fish.  (Here) The Small Fire crackers tutorial is Here.
Simple striped bunting with felt star. I have them stuck to the shelf with poster putty.
Washi Tape Pin wheels. Who needs fancy paper when you have washi and plain paper. 

 I used my 4th of July Printable here for the framed subway art.
So there it is my 4th of July Mantel.  It looks amazing on my shelf.  So fun and Patriotic.  Come back tomorrow or a Tutorial on the Washi Tape Pinwheels.  They are super easy and fun to make in with the kids in your Free Time.  Thanks for visiting.

52 Mantels

Check out the entire post on my blog www.freetimefrolics.com
  • « Previous Page
  • 1
  • …
  • 38
  • 39
  • 40
  • 41
  • 42
  • …
  • 49
  • Next Page »
  • Facebook
  • Google+
  • Instagram
  • LinkedIn
  • Pinterest
  • StumbleUpon
  • Twitter
  • YouTube

Shop my Moji LIfe

Shop my Plexus

SEARCH MY BLOG

INSTAGRAM @Freetimefrolics

MY RECENT PINS

Visit Adrienne {FreeTimeFrolics.com} Blogger's profile on Pinterest.

Categories

Archives

FOLLOW ME HERE

  • Facebook
  • Google+
  • Instagram
  • LinkedIn
  • Pinterest
  • StumbleUpon
  • Twitter
  • YouTube

Copyright © 2026 · Modern Blogger Pro Theme By, Pretty Darn Cute Design