Free Time Frolics

  • PRINTABLES
  • EAT
  • House
  • Make
  • Sewing
  • LDS
  • Home
  • About
  • Pr/Advertise
  • Contact
  • Shop
  • Store

Best Crock pot Rotisserie Chicken you have ever eaten!

May 5, 2014 By: Freetimefrolics

Rotisserie chicken www.freetimefrolics.com
Crockpot Rotisserie Chicken Recipe www.freetimefrolics.com
So a few weeks ago I started a 21 day program.  I am trying to get off those stubborn 15 pounds that keep bringing me down. So I have been looking for recipes and foods to help me on my journey. I love rotisserie chicken. Like the ones you get at the supermarket for $5.  You can use it in salads, sandwiches, wraps or just to eat. Just about anything you use rotisserie chicken for. I love the flavor and the ease that comes with buying one and and having it ready to eat. So when I was finding foods to eat for my 21 day fix I wanted to make my life as easy as possible and still eat clean. So I took a recipe from a recipe book that was for grilled chicken and made it in the crockpot.  It tasted just like the rotisserie chicken you buy in the store, but better. Juicy and already pulled off the bone! I also love having a recipe knowing what spices are in it.  Most of the spices you already have in your pantry.

So here is what you need to make the best Crockpot chicken ever!

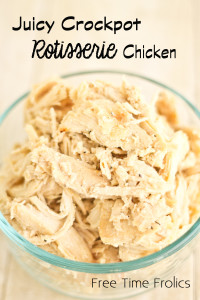
Shredded Crockpot Rotisserie Chicken Recipe

4 frozen chicken Breasts or more if you like
1tsp. garlic powder
1 tsp onion powder
1 tsp. Mustard powder
1 tsp. sea salt
1/4 tsp. thyme
 Pinch or two pepper
Mix your spices together.  Place chicken in a crock pot. Sprinkle seasoning on chicken.  Cover and turn on High for 3 hours.   Turn to low for about 2 more.  Shred chicken in juices and serve.
I like to have mine alone, in a tortilla, on a salad, in enchiladas, or anywhere you need shredded chicken.
Crockpot Rotisserie Chicken Recipe www.freetimefrolics.com salad
This stuff will blow your mind. I promise!
You may want to cook extra.  I made 5 chicken breast in anticipation to have leftovers for my program the next day and my kids ate it ALL! They even asked if we could have it the next day.
So tell me how do you eat your chicken?
Save Print
Best Crock pot Rotisserie Chicken you have ever eaten!
Author: Free Time Frolics
Recipe type: Main Dish
Prep time:  10 mins
Cook time:  5 hours
Total time:  5 hours 10 mins
Serves: 4c
 
Ingredients
  • 4 frozen chicken Breasts or more if you like
  • 1tsp. garlic powder
  • 1 tsp onion powder
  • 1 tsp. Mustard powder
  • 1 tsp. sea salt
  • ¼ tsp. thyme
  • Pinch or two pepper
Instructions
  1. Mix your spices together. Place chicken in a crock pot. Sprinkle seasoning on chicken. Cover and turn on High for 3 hours. Turn to low for about 2 more. Shred chicken in juices and serve.
  2. I like to have mine alone, in a tortilla, on a salad, in enchiladas, or anywhere you need shredded chicken.
3.2.2929

Fire and Ice Popcorn Recipe

May 2, 2014 By: Freetimefrolics

CInnamon and whote chocolate fire and ice popcorn www.freetimefrolics.com
A Few days ago I shared a recipe for Cinnamon Bear Popcorn.  It is super delicious. Crunchy popcorn with a chewy cinnamon bear mixed in. One of my favorites to date. I thought it would be quite fun to add a little twist to it.   I mixed it with a little white chocolate. For a Fire and Ice Popcorn.  It is so easy to make and everyone will love it!

[Read more…]

Alex Boye’ “Let it Go” Inspired Winter White Sunday Dress

April 30, 2014 By: Freetimefrolics

frozen dress, sewing www.freetimefrolics.com
Several weeks ago we found a a music video online with the song “Let it Go” from Frozen, with the voices of Alex Boye’ and Lexi Walker. My daughter became obsessed with the video and song.  I think every girl is!  I was more obsessed with the dresses the little Power house singer was wearing. I literally stayed up looking online for the two dresses. My husband just sat and laughed at me.  He finds my crazy funny.  But he knows once my brain starts looking it can’t stop until I find what I am looking for.  I found the black and gray dress in the price range of $150. The cream one I couldn’t find.  So I decided to make it myself.  So here is my take on the beautiful winter white dress Lexi was wearing in the music video.  A simple and Elegant winter white dress.
Let it Go Inspired winter white sunday dress www.freetimefrolics.com


I Just met Alex over the weekend and he is amazing!  Yep I tooka picture with him and he help mu hand as he sang into my phone! His story, his voice and how he interprets music is a true gift! Get ready to be inspired!

But before I get into the dress.  Take a look at the video. This eleven year old power house is amazing.  You can’t watch it just once!


Everything about that video is inspiring.  The women who put together the outfits and make up are incredible.I love their choices.  My little miss just had to have the dress.  So here is how I made it.

Well to start I used knit fabric and sheer tricot. What is sheer tricot you ask?  Sheer tricot or Tricot Chiffon  is a soft porous fabric. Much like tulle only softer.  It lays soft and moves naturally.  When making dresses I love this stuff.  They use it in lots of dresses you can buy at the store. It has proven to be a little difficult to find. So I searched online for the best place to find it!  Check out Fabric.com for a few colors!

So here are my tips for making this dress.
*Make the bodice according to your little miss. Mine is super skinny so I had to make a size smaller but I added for the length because she is so tall.

*When using knits, on a regular cotton pattern you can go down a size. Because of the stretch. But in this case I did the chosen size because I did knit as my main fabric and had a sheer tricot over the top making the knit not stretch.

*No need to hem. Knits and tricot sheer don’t unravel or fray. That’s why I love them so much!
So here you go!

I started with this pattern.  I used it because I liked Loved the cap sleeve.  It seems like all the dresses either have huge sleeves or are sleeveless.  This pattern is the perfect mix of both worlds. You can bet I will be using this bodice again in future dresses! I also loved the variety in the pattern. A jacket, ruffle pants and a dress. It’s kind of an all in one!

Simplicity pattern 1476a

I followed the pattern for the bodice then measured my little miss for the length I wanted and adjusted accordingly.

When cutting the bodice I cut one of knit and one of sheer tricot. To sew them place the tricot on top of the knit. Pin it well! Sew quick stitch around the edge to hold it in place. Then continue on with hemming.

I made the skirt 3 inches shorter than the tricot sheer.  Follow the directions for zipper placement and skirt waist measurements.

I added my ribbon colorand hair flower for a little pop of color.  I love that I can use any color with this dress.  Who knows I may add a Turquoise ribbon and flower next week!

This dress is nothing fancy but when you add the tricot you get a whole new look.
I added cream satin mini flowers to the neckline and also to her hair. Check out my Satin hair flowers post to make some of your own!

(function() { var po = document.createElement(‘script’); po.type = ‘text/javascript’; po.async = true; po.src = ‘https://apis.google.com/js/platform.js’; var s = document.getElementsByTagName(‘script’)[0]; s.parentNode.insertBefore(po, s); })();


Cream easter dress vintage inspired collage www.freetimefrolics.com #dress #diy

As you can see I added a large satin flower to add a a dramatic effect to her hair.  These satin flowers are so simple to make using satin, some leftover sheer and lace.

This dress is just what my little miss likes.  Simple and elegant.  What kinds of dresses does yous like? Ruffles, Simple, over the top??  Tell me I want to know!

Linking up! {Here}


(function() {
var po = document.createElement(‘script’); po.type = ‘text/javascript’; po.async = true;
po.src = ‘https://apis.google.com/js/platform.js’;
var s = document.getElementsByTagName(‘script’)[0]; s.parentNode.insertBefore(po, s);
})();

Light up your life with Super Bright LED’s

April 28, 2014 By: Freetimefrolics

I am a member of the Collective Bias®  Social Fabric® Community.  This shop has been compensated as part of a social shopper amplification for Collective Bias and its advertiser.
Super Bright LEDs www.freetimefrolics.com #shop #LEDSavings
I have been super excited about sharing this post with you. I love my Super Bright LEDss Light Bulbs. But not as excited as my husband.  He is a total techie and loves to keep current with all things Technology. So today you are getting our first ever post from my husband. We are going to call it Chris’ Corner. All things Technology! So with out further delay her you go!
Before I begin, I probably need to explain a little bit about my personality. I am by no means lazy, I believe in working hard and playing hard. But there are a few things that I absolutely hate and attempt to avoid at all costs. One of those is yard work. While I know plenty of people that enjoy a perfectly cut lawn, and gain a sense of accomplishment at gloriously sculpted bushes and flower beds. I personally feel that I am just going to have to start all over again next week. I would much rather replace my lawn with AstroTurf and cement then spend a minute doing yard work. (By the way do silk flowers last outside?)   Another of my hates is house maintenance. I dislike the fact that things break and wear out. It always seems to happen at the worst times too. Like the time I just paid for a family vacation and then the washer and dryer both died. Yeah, awesome. But, unfortunately as a home owner I have come to accept that I will constantly be forced to fix broken sprinklers, paint walls, replace disposals, water heaters, etc. It is because of my hate of home maintenance that I feel it no small victory when I am able to find a long term solution that requires absolutely no upkeep. For example, my patio is Trex and cement, my fence is vinyl and I purchase items with warranties as often as I can. (Not the extended warranties mind you, those are a rip). Anyway, when my wife was asked to write about this latest product I told her that I would do it. Not because she is over stressed and tired from  being an awesome wife and mother, but because this is actually a product that speaks to me. The product itself at first may not seem that remarkable, and that is probably why I wanted to share it instead of my wife. To understand why it is remarkable you have to understand really what it is and where it came from. The product is Super Bright LED light bulbs. Now if you think “LED power, big deal” then I hope you keep reading because it is a big deal. 

Growing up my father would come home from work and, of course, find all of the house lights on. He would grumble about not being made of money and working all day just to pay the electric company, and so on. Unfortunately back then he was right. Lighting a house was a significant expense. I also remember how expensive those old Tube TV’s were to run. Well technology as made huge stride in the last decade and now our once power Hungary homes are filled with devices that take so little power to run that turning them off produces only a minor dip in your monthly electrical bill. This is largely because of LED’s. They used almost no power. Think about it for a second, have you ever grabbed an old time florescent light bulb after it has been on for a while? It will burn you. That is because it is so inefficient that most of its energy is turned into heat instead of light. This same technology was used in our TV’s, flashlights, cars and so on. But LEDs don’t get hot. That is because nearly all their energy is turned into light, actually 90% of it is. This LED technology is not new, it has been around for 50 years. We have used them in alarm clocks and timers, then computers and TV’s and finally now they are available in a standard light bulb. To be honest, this was something that engineers have been trying for years to accomplish. Until recently they just could not get them bright enough and small enough to be used as a light bulb. Now, these highly efficient LEDs use even less power than those light UV light bulbs that were so revolutionary just a few years ago; and not just a little bit less a lot less. (Oh, and they are not toxic when they break. I just thought I would mention that.) Now, here is where my story comes full circle. These light bulbs last forever, and I am not talking about a few years I mean decades here. That’s right this home owner will pull out the ladder set it up. Replace the bulb, put the ladder back then fix the holes in the walls I made from moving the ladder, just once. The next time it needs to be done I’ll get my grandkids to do it. Hurray!! for small victory’s. Oh, and the while these bulbs cost more upfront then your standard old timey bulbs. They will save you a lot of money over the long run not only in the cost of constantly replacing the crappy bulbs that burn out but in the wasted electricity. Also the price will come down. It has already dropped a lot since the first bulbs I bought a year ago. And yes the fact that I bought those a year ago means that I am not just on board because I was asked to be, and was given some free product to try. (By the way if you’re reading this please send more). I truly love the fact that I don’t need to worry about the lights being left on, or replacing bulbs. Oh, and for all you tree huggers out there, think about how much smaller your carbon foot print will be. Yeah, win, win right. For the rest of us imagine golfing on your Saturday’s instead of once again working on the house that’s my goal. And to my lovely wife, yes I will get to those bulbs in the loft next week, I promise. 
Soft white like lighting www.freetimefrolics.com #shop #LEDSavings
 So here is our dark, dim mud/ laundry room. With LED bulbs we have a brighter more white light look! When you don’t have windows you really crave that soft white light.  These LED bulbs are a perfect fit!
I decided to make a little comparison chart with basics traits of the different kinds of bulbs.  Here is what I found!
Light bulb comparison www.freetimefrolics.com #shop #LEDSavings
The results.  Better for your health, long term savings and less work for you!
Okay so now that you have listened to my husband’s soap, box here are all the details on these super bright LEDs!  I truly love these bulbs.  #CollectiveBias did not need to ask me to share my experience. I asked for it because we love them so much! Not only did we already have them in our home but we plan on buying them slowly as we replace bulbs as needed.  Not only do they look great and give off a Soft white like light but they also last 15 times longer than a regular incandescent lights.  Which means I save money and change the bulbs less often.  Like every few decades! Check out how much you can save with there Annual Savings Calculator!  These bulbs do cost a bit more than a regular bulb but they last longer, which more than makes up for the price.
GE LED lighting www.freetimefrolics.com #shop #LEDSavings @SamsClub
At my local Sam’s Club I found 6 of the Bulb choices GE had to offer. With a great price you can start changing the bulbs in your house! I love that they come in two wattage choices, 40 and 60 watt, flood lights, decorative bulbs 2 pack, globe bulbs 2 pack, a multipurpose 2 pack and a Can light choice.  I have 20 can lights on my main floor. Yikes!! Right? The can lights cost a bit more that the regular bulbs but well worth the price.  You can totally ditch the can light and wire them right into the ceiling and don’t worry about them for decades.  I may never have to change them again for as long as I own my home!
Energy Smart LED lighting www.freetimefrolics.com #shop #LEDSavings
So if my husband hasn’t convinced you or my love of this amazing product or even the savings and years you can go without changing a bulb, check out GE’s social media and website to learn more about Super Bright LED‘s and how they can help reduce your Electric Bill and your Carbon footprint!
Facebook – www.facebook.com/gelighting
Twitter – www.twitter.com/gelighting
Instagram – www.instagram.com/gelighting
Website – www.gelighting.com
For a coupon to try GE LED power bulbs click the link and give them a try!!

Linking up! {Here}

(function() {
var po = document.createElement(‘script’); po.type = ‘text/javascript’; po.async = true;
po.src = ‘https://apis.google.com/js/platform.js’;
var s = document.getElementsByTagName(‘script’)[0]; s.parentNode.insertBefore(po, s);
})();

Cinnamon Bear Popcorn {Recipe}

April 23, 2014 By: Freetimefrolics

cinnamon bear popcorn www.freetimefrolics.com
Lets start with a little story from the past.  When I was pregnant with my oldest I had crazy cravings. I would crave steak, orange juice, watermelon and cinnamon bears.  I just couldn’t get enough. Now I have always likes these food but pregnancy took them to a whole new level.  I think we ate steak 4 times a week.  Watermelon and orange juice were always in the fridge and the cinnamon bears… Well my husband did his best to keep them out of the house.
One evening we were driving home from the in-laws when I said to him, “Hey stop at the store, I want cinnamon bear.”  He did not want to stop.  He was bent on not stopping.  To say that we got into a tiff was an understatement.
Now every woman knows and so does my husband know. When you have a craving you need to eat it!  Any usually its not the whole bag or carton. Just a few bites or an handful of the treat.
So I threatened him.  I told him even if he wouldn’t stop I would get into my own car when we got home and go get them myself.  So he stopped! (small victory!!) I grabbed my bag of cinnamon bears and ate a handful the rest of the way home.  I was a happy girl with a happy fetus inside.
Ever since then I have always loved cinnamon.  Bears, chocolate covered ones or chewy cinnamon in any shape!

So a few weeks ago when  a friend gave me this amazing cinnamon popcorn for my birthday.  It tasted wonderful. And I was in love! My dad happened to be here and we went to the Popcorn shop and got a second bag for him.  The flavor was awesome.  So I set out to find a recipe that I could make my self. I found a bunch online that used red hots.  But I couldn’t find any red hots at the store to I had to improvise.   I decided I would use Cinnamon bears instead.  The result, cinnamon popcorn with chewy cinnamon bears in every bite.  So today I thought I would share my easy recipe with you on how to make Cinnamon Bear Popcorn!

Cinnamon Bear Popcorn Recipe

1/2 C.  Butter
1/2 C. Corn Syrup
1 t. Cinnamon oil
20 Cinnamon Bears Chopped
Chop up your cinnamon bears.  They really don’t melt that well unless you chop them and your mixture is extremely hot.
Place the butter, corn syrup and cinnamon bears into a pot.  Bring them to a simmer. Allowing the bears to begin to melt.  I let mine simmer about 8 minutes.  Add your oil.  You can add a little more if you like it really hot.
Pour your mixture over 4-5 cups of popcorn. Coat popcorn and place on a parchment lined baking sheet.  Bake at 200 degrees for 15 minutes turning popcorn every 5 minutes.
Let it cool for 30 min then break up in to smaller chunks. Store in an air tight bag for up to a week.
Moral of the story give your wife what she craves.  She is being crafty and growing a baby. She deserves it!
Enjoy!

Homemade Healthy Egg Rolls with Sweet & Sour Sauce

April 21, 2014 By: Freetimefrolics

turkey egg roll recipe www.freetimefrolics.com
Over the past few weeks I have been doing the Fix 21 program to help me size down a bit.  I have been craving Chinese food like crazy like egg rolls and sweet and sour chicken. Chinese food doesn’t really fit the 21 Fix Meal plan.  So I came up with a Healthy Egg Roll that I can enjoy and not feel guilty. Filled with vegetables and ground turkey.  You can bake them or fry them (Not so healthy).   Even better, my kids love these and eat them all up! They have no idea they are eating there veggies!

[Read more…]

Top 10 Emergency Preparedness Post Links

April 17, 2014 By: Freetimefrolics

As a member of The LDS Church I have learned since I was young Always be prepared.  Now my family was not always active and we frequently lived month to month. So preparedness was not really something we did.  But as I got older I began to learn more and more about being prepared and the blessings that come from heeding the prophets words. Preparedness is not just something that is for the Zombie Apocalypse or a huge natural disaster.  But can be used when life isn’t going our way or during an economic down turn.  I have and know families who have used food storage after a job loss or 72 hour kits were used after a fire or flood.  President Hinckley gave a talk, If ye are prepared ye shall not fear. After hearing that talk I decided that I would take the 5 topics he suggested and begin to work on those things to have for my family. So today I have compiled blog posts from others to give you the Ultimate Top 10 Emergency Preparedness blog links to help you get prepared! Being prepared for any kind of disaster is so important. Gathering a few everyday items to a central location can make a difference!

LDS Preparedness
printable lists for 72 hour kits
Pets and disasters
Preparedness Kits for Pets
Family Preparedness Binder Information
These printable’s are a wonderful to print off and put in a binder.
Family Binder Printable’s
water storage FAQ
Water Storage
Emergency Clutch
Mini First Aid kit DIY
 
Full First Aid Kit
 
How to Organize and store your winter gear for an emergency via Freetimefrolics.com #preparedness
Storing your Winter Gear
 
Winter Car Kit
 
Sanitation Kit
Gardening for Survival
Bug out Bag Printable Lists
Toiletries & survival gear
Food & clothing lists

Linking up! {Here}

(function() {
var po = document.createElement(‘script’); po.type = ‘text/javascript’; po.async = true;
po.src = ‘https://apis.google.com/js/platform.js’;
var s = document.getElementsByTagName(‘script’)[0]; s.parentNode.insertBefore(po, s);
})();

Mother’s Day Gift Card Printable + {Be Radiant} Blog hop

April 16, 2014 By: Freetimefrolics

Mother's day gift card holder printable www.freetimefrolics.com
This year is the Pantone color of the year is Radiant Orchid.  Not necessarily my favorite color but I thought it would be fun to challenge myself to use the color some how.  I joined with a few bloggers to present ideas and DIY to use the color in you everyday life.  Instead of using the color to add to my home I thought I would play on the words for something fun.  I created an easy to printable gift card holder for Mother’s Day or just to say Thank You to someone special.  Pair it with a gift card to your favorite Spa, massage or nail parlor.  I mean what mom or teacher or friend doesn’t love to get pampered.  her nails done or have a massage?  So click on the link below and print one out for your Mother, Grandmother, sister, teacher, friend or neighbor.

[Read more…]

Mr. & Mrs. Bunny Silhouettes {Easter Mantel}

April 4, 2014 By: Freetimefrolics

Nothing says Easter season like a cute fluffy bunny. For this Easter I have a vintage Piano in my Front living room that I didn’t have last year.  I have been so excited to add a little something to the top.  I started out with a totally started out with a different idea and it evolved into these adorable Mr. &Mrs. Bunny silhouettes. I cut the bunnies and doilies with my paper cutter. I absolutely love how they turned out! Here is how I did it.

[Read more…]

Embroidery Hoop Bunny Door Decor

April 2, 2014 By: Freetimefrolics

Embroidery Hoop Burlap Bunny Door decor via www.freetimefrolics.com #bunny #decor #easter
Burlap is super popular this season.  I have been seeing it everywhere. I wanted to add it to my decor this spring to give ti a little rustic look.  My door needed a little sprucing up.  I love bunnies and it just happens to be the season.  So I found some embroidery hoops and Burlap at Joanns and went to town.  I made my bunny for less than $5!  Not to bad for  door hanging Peter cottontail! He was super easy to make and took about an hour. So lets get started!
 

 Burlap Bunny Tutorial

Supplies:
2 embroidery hoop. different sizes
1/3 yard burlap- more if your hoop is larger than 12 inches.
fabric scraps
Glue gun
electrical tape
cream or white yarn for pom pom
1. Tape your hoops together.  I used electrical tape because it had a little give in the stretch.  Tape them with the tightening screws facing out so you can get your burlap in.
2. Start with the bottom burlap. Just add like you normally would.  Make sure your fabric is in tight.
3. Add burlap to the top hoop.
4. Trim your edges and hot glue the frayed burlap to the hoop. Cut a 6-8 inch rectangle.  Cut down the center about half way and then shape to loop like ears. Pull the bottom edges together and bunch up to make bunny ears and attach them to the hoop.
Embroidery hoop burlap bunny detailed indtructions
Add your embellishments and you are all done. I added a few rosettes for the ears and a matching neck bow.  Then a pom pom for the tail. You could also add a little color to the ears.
Embroidery hoop bunny with burlap www.freetimefrolics.com

Embroidery hoop bunny with burlap www.freetimefrolics.com

Use your bunny on a door or mantel with your Easter decor. Do you have a favorite door decoration for Easter?  Please share!


  • « Previous Page
  • 1
  • …
  • 14
  • 15
  • 16
  • 17
  • 18
  • …
  • 49
  • Next Page »
  • Facebook
  • Google+
  • Instagram
  • LinkedIn
  • Pinterest
  • StumbleUpon
  • Twitter
  • YouTube

Shop my Moji LIfe

Shop my Plexus

SEARCH MY BLOG

INSTAGRAM @Freetimefrolics

MY RECENT PINS

Visit Adrienne {FreeTimeFrolics.com} Blogger's profile on Pinterest.

Categories

Archives

FOLLOW ME HERE

  • Facebook
  • Google+
  • Instagram
  • LinkedIn
  • Pinterest
  • StumbleUpon
  • Twitter
  • YouTube

Copyright © 2026 · Modern Blogger Pro Theme By, Pretty Darn Cute Design